

First thing's first: tools. You'll need
1)
Retractable knife, or small screwdriver
2) Large flat bladed screwdriver
3) 6mm allen key
4) Pliers

This is what we need to remove - the original A-pillar trim. It is secured by two 6mm allen bolts, and 3 clips. It is also sealed against the A-pillar by the rubber door seal.

First step is to remove the rubber door seal. This just pulls off. Remove it from the B-pillar, along the roofline, and down the A-pillar as far as the top of the dash.


There are two allen bolts holding the trim to the A-pillar; one is located at the base of the trim (pictured), whilst the second is where the A-pillar meets the roof.
They are both covered by plastic plugs which need carefully removing. I used the tip of a small retractable knife (NOT the blade!) but a small screwdriver would be just as effective.

Now, using a 6mm allen
key,
remove the two allen bolts.


Now for the hardest bit.
The trim is held on by 3 clips (see picture) which are VERY tight. Carefully prise the clips away from the body of the car using a large flat bladed screwdriver.

Once all 3 clips have been prised out, remove the trim. Start by pulling it out from behind the B-pillar trim, then lift out the entire trim from the side of the dash
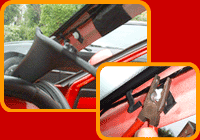
If any of the trim clips remain in the A-pillar or roofline, they can be easily removed with a set of pliers.
If you have not already plumbed in your boost gauge, now would be a good time.
See my guide for the 16VT HERE.

I found that the best way to secure my gauge was by running strips of insulation tape around the gauge until it produced a tight fit within the A-pillar pod trim. This allows easy access to the rear of the gauge without having to remove the entire A-pillar pod trim. It also allows fine adjustment of the angle that the gauge sits at.
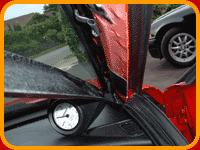

Firstly, feed the A-pillar pod trim into the space at the side of the dash
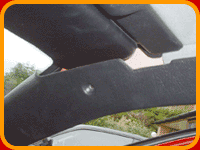

Now for the second tricky bit.
You need to ‘bend’ the A-pillar pod trim slightly where the sun visor is to allow the other end of the A-pillar pod trim to get behind the B-pillar trim, however FIBREGLASS IS VERY BRITTLE. This means that you must only bend it a very slight amount, and make the bend as ‘flat’ as possible.
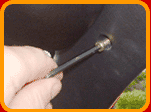
All
that remains to do now is to replace the two allen bolts, taking care
NOT TO OVERTIGHTEN them, then refit the rubber door seal.
NOTE. The original plastic bolt caps will not fit the new trim. You can
either paint the allen bolts black, or leave them as they are - they're
not really seen anyway.

Job
done!
Now
go out for a blast and see what boost your Coupe’s putting out.